How To Upload Document Files To ChatGPT
Back then, if you wanted to use ChatGPT to analyze information from a PDF or Excel spreadsheet, you had to manually type everything into the chat.
But things have changed! Now, with the latest versions, ChatGPT-4 and ChatGPT-4o, you can upload any file, from PDF, DOCX, or Excel to JPG and even CSS, etc., directly into the chatbot.
This article will show you how to do just that.
Who Can Upload Document Files To ChatGPT?
This file-uploading feature is currently exclusive to ChatGPT premium plan subscribers (Plus, Team, and Enterprise). These plans start at $20 per month, but they give you access to the latest versions, ChatGPT-4 and ChatGPT-4o, which integrate the file uploading feature and many other useful tools.
So, if you want to try it out, make sure to upgrade your account.
How To Upload Document Files To ChatGPT
On Desktop
Step 1: Sign In or Create an Account
Before you begin, make sure you’re signed into your OpenAI account. If you don’t have an account yet, take a moment to create one.
Step 2: Uploading the file
You can drag and drop the file directly to the chatbox or look for the upload icon, which typically looks like a paperclip situated on the left side of the chat input box. Clicking this icon will initiate the file upload process.
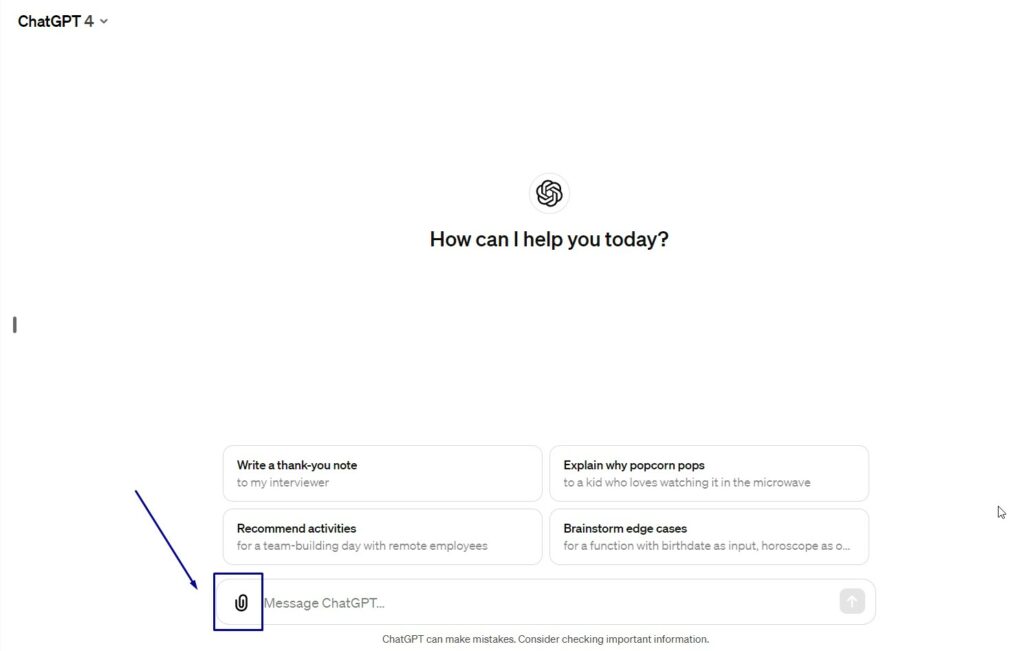
A dialog box will appear, allowing you to browse and select the desired file from your device. ChatGPT supports various file types, including documents and images.
You can choose multiple files to upload to ChatGPT
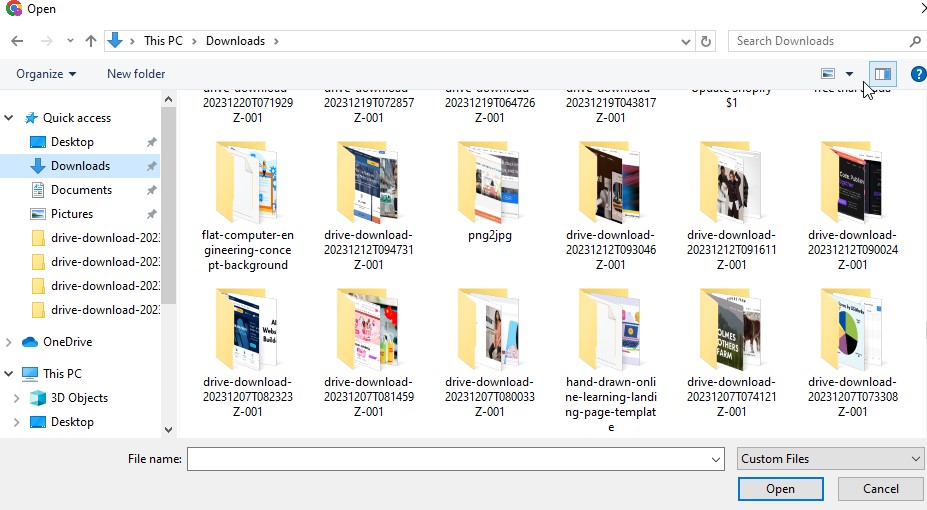
Step 3: Complete the Upload and Add Your Prompt
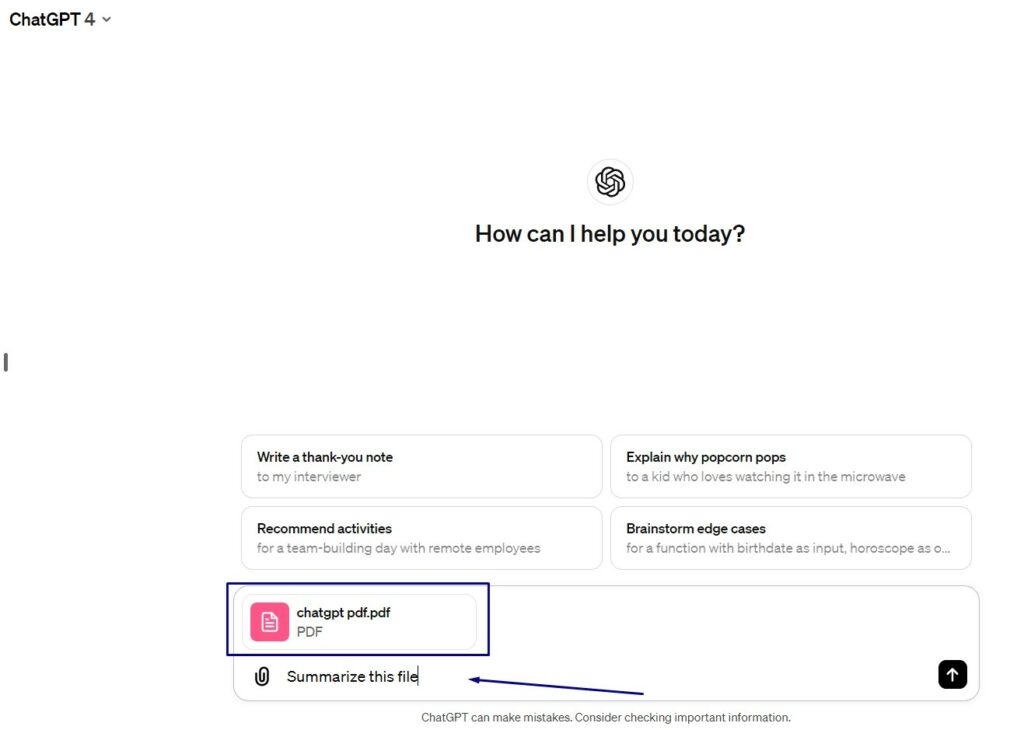
Once you’ve chosen your file, proceed with the upload. The upload time will vary based on the file’s size and your internet connection. Wait for the process to finish before moving on.
After your file is uploaded, provide ChatGPT with some context or a prompt related to the file for tailored assistance. You’re now ready to engage with ChatGPT about the content of your file.
On Mobile
Uploading your file on the ChatGPT app is just as easy. I’ll take an example from my iOS device:
- Step 1: Sign in or register
- Step 2: Give ChatGPT access to your camera and files and allow it to take photos directly from the app
- Step 3: Choose one of the three buttons on the bottom left to upload your file
- The camera button: Take a picture and send it directly to the app
- The picture button: Upload a picture from your Camera Roll
- The file button: Upload a file from your Files app.
- Step 4: Wait for your file to upload, add your prompt, and hit Send.

Alternative Ways To Upload Documents To ChatGPT
Besides, there are other ways to upload your files to ChatGPT. Let’s explore some of them!
Using an Extension
The ChatGPT file uploader extension supports a wide range of document formats such as TXT, JS, PY, HTML, CSS, JSON, CSV, MD, TS, TSX, JSX, PDF, DOC, DOCX, XLS, XLSX, and ZIP. Follow these steps to get started:
Step 1: Install the Extension
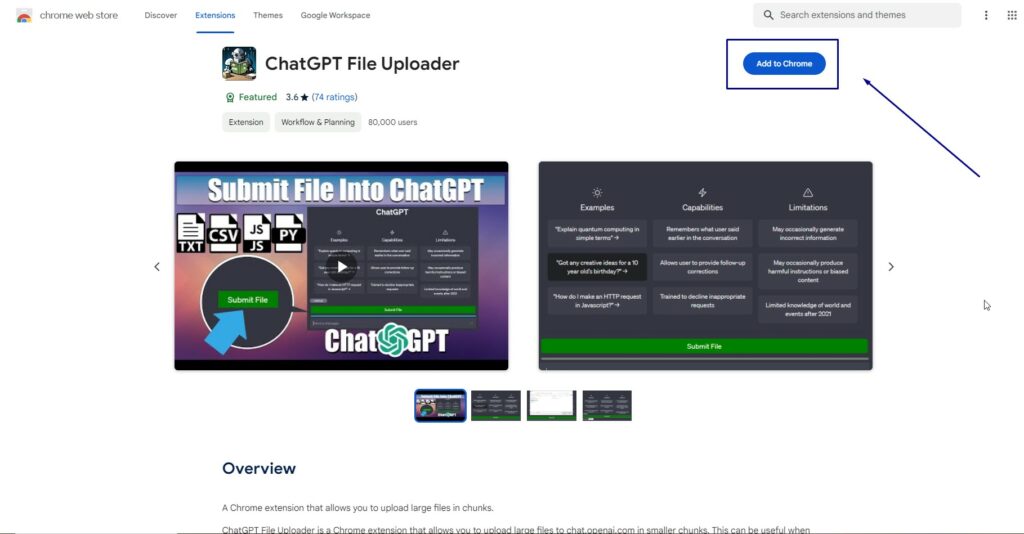
- Open Google Chrome and find the ChatGPT file uploader extension.
- Click the “Add to Chrome” button to install.
- A pop-up will ask for your confirmation. Click “Add extension” to proceed with the installation.
Step 2: Log into ChatGPT
After installing the extension, sign in to your ChatGPT account.
Step 3: Start Uploading
In a new chat session, look for the “Submit File” button. Select and upload the document you want to discuss. Once the document is uploaded and processed, you can add your prompt about the file’s contents to ChatGPT.

Using a Plugin
ChatGPT offered a variety of plugins to extend its functionality, including one specifically designed for uploading and interacting with PDF files. The plugin, called AskYourPDFs, simplifies the process of working with PDF documents within ChatGPT.
Here’s a brief guide to get started with this plugin to upload PDFs to ChatGPT.
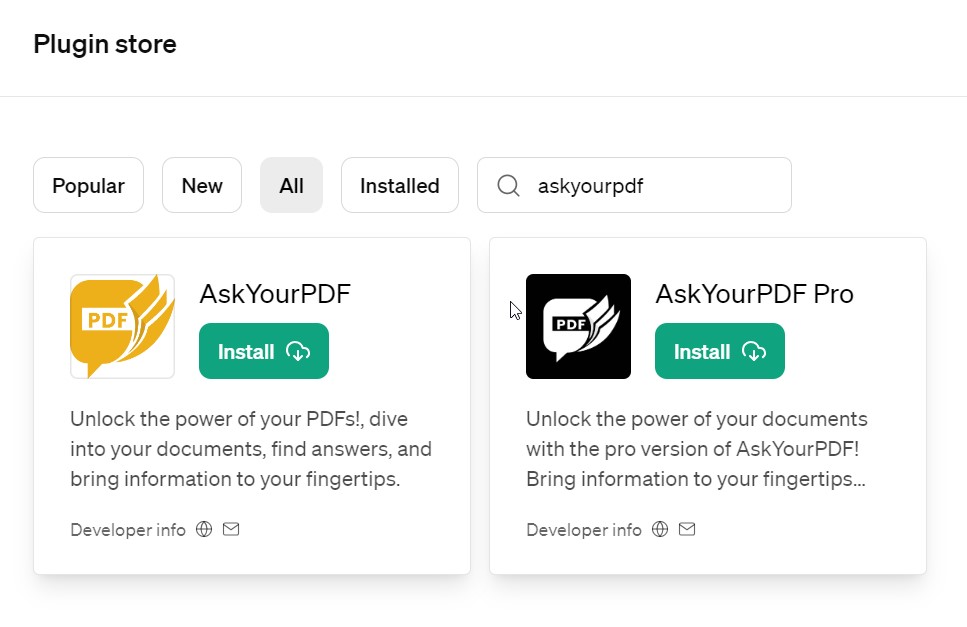
Step 1: Install the AskYourPDF Plugin
Proceed to the Plugin store within your account. Search for the AskYourPDF plugin and install it to your ChatGPT account.
Remember to subscribe to ChatGPT Plus beforehand.
Step 2: Activate AskYourPDF
After installation, you must activate the plugin by clicking its icon on the drop-down menu

With the plugin now activated, you’re ready to upload your document.
Step 4: Document Upload
With AskYourPDF activated, you have two options for uploading your document:
Visit askyourpdf.com and upload your document there. Alternatively, paste the document’s link directly into ChatGPT. The AskYourPDF plugin will handle the download.
However, it’s important to note that the ChatGPT plugin feature is no longer available.
Using BookGPT
OpenAI’s introduction of BookGPT, a specialized model for processing books and long-form text, offers a unique solution for specific document types.
- Step 1: Sign in to your OpenAI account or create a new one.
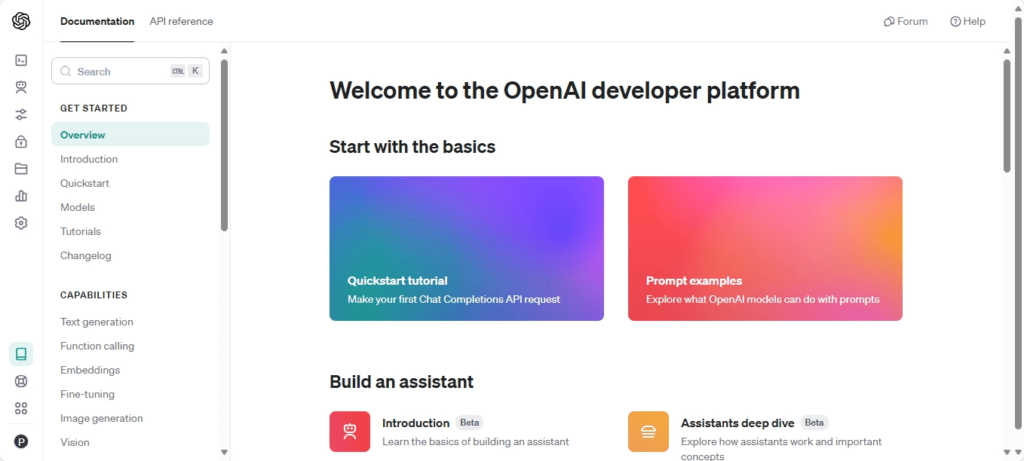
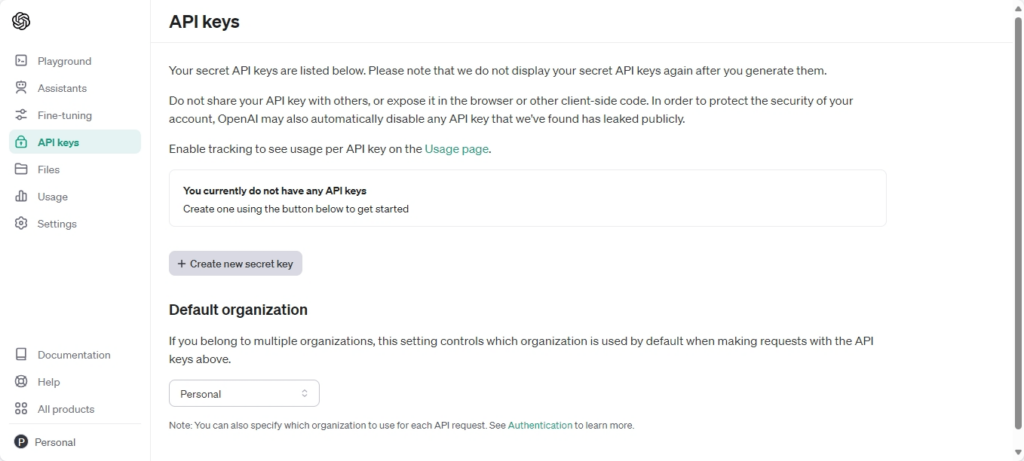
- Step 2: Click on “Create a new secret key” in the API Keys category to obtain your unique access code.
Step 3: Go to the BookGPT project and paste the secret API key at the bottom of the page.
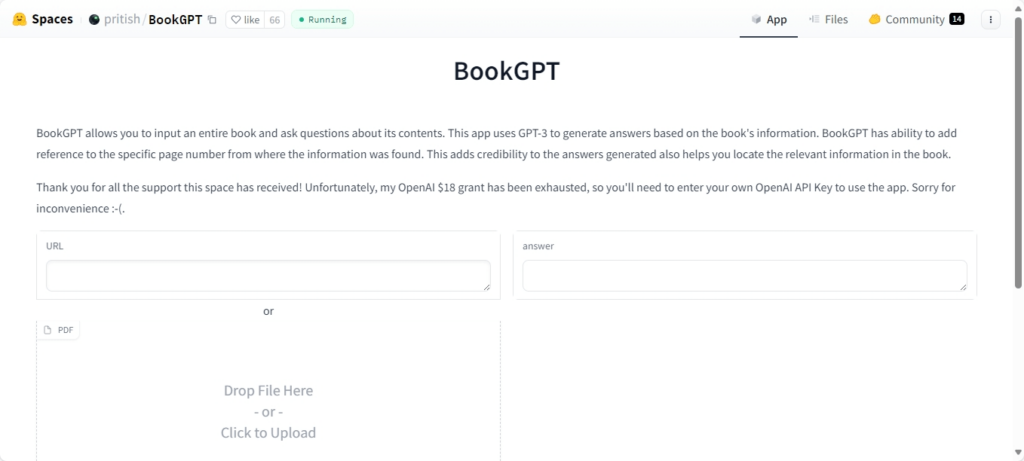
Step 4: To add a document, either share the PDF link or upload a local PDF file directly into ChatGPT.
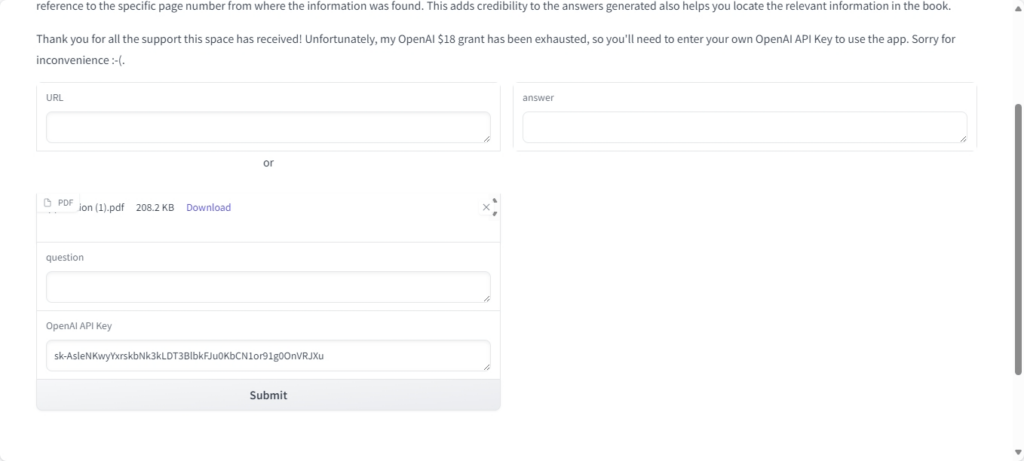
Step 5: Input your prompt and hit “Submit.”
Step 6: Wait a few seconds for the document to be processed.
3 Things To Consider When Uploading Your Document File To ChatGPT
When uploading files to ChatGPT, keep the following factors in mind:
- File Format: Ensure your document is in a supported file format. Common formats include PDF, DOCX, and TXT.
- File Size: Make sure your file size is a maximum of 512MB. Keep in mind that larger files may take longer to upload and process.
- Privacy and Security: Consider the sensitivity of the information in your documents. It’s best to avoid uploading files with sensitive personal information, like your Social Security number, address, financial documents, or phone numbers.
Bottom Line
Now you know how to upload your document files to ChatGPT, you can try them now to unlock the full potential of ChatGPT for document analysis.
FAQs
Can you upload documents to ChatGPT?
Will my uploaded documents remain private and secure?
What should I do if I need ChatGPT to analyze a document in a language other than English?
Is there a limit to the amount of text I can input into ChatGPT from a document?

ChatGPT’s Second Anniversary

How to Use Kayak ChatGPT Plugin to Plan Your Trip

